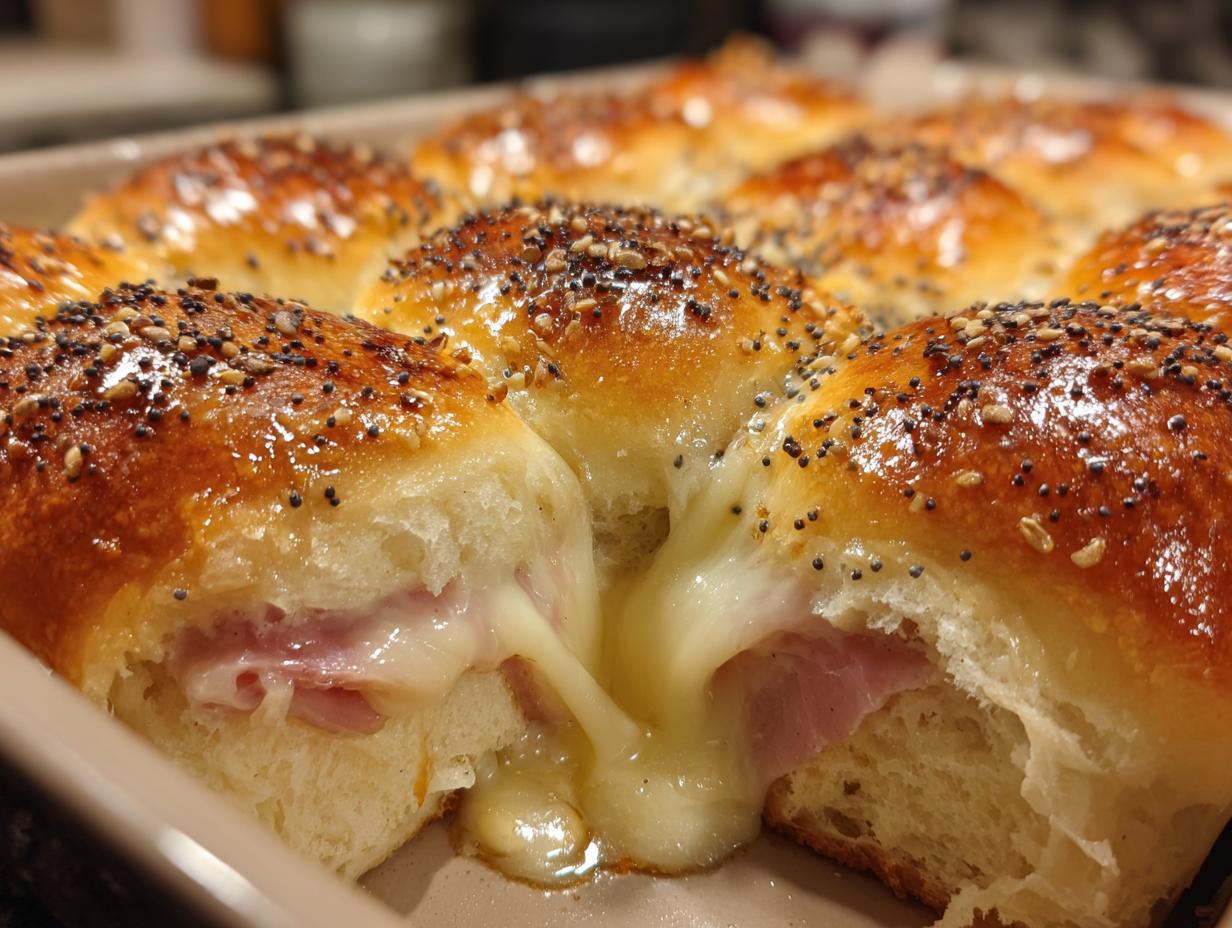
Oh my gosh, let me tell you about these baked ham and cheese sliders—they’re the little sandwiches that’ll save your sanity when you need something delicious in a hurry! I make them at least twice a month because they’re perfect for everything from last-minute potlucks to those “I forgot to cook dinner” emergencies. The best part? You probably have most of the ingredients in your fridge right now. Just imagine warm, buttery rolls hugging melty Swiss cheese and savory ham, all baked until golden. And that tangy mustard sauce drizzled on top? Absolute magic. These sliders disappear fast at parties, but don’t worry—they take less than 30 minutes from start to finish. My kids beg for them, my husband sneaks extras, and I love how the whole house smells like a cozy bakery when they’re in the oven.
Why You’ll Love These Baked Ham and Cheese Sliders
Okay, let me count the ways these sliders will become your new go-to. First off—they’re ridiculously easy. I’m talking 10 minutes of prep, tops. You’ll be popping them in the oven before your coffee even finishes brewing. Second? That cheese pull when you bite into one—pure happiness. Swiss melts like a dream, but don’t stress if you only have cheddar. Any melty cheese works!
Here’s why I’m obsessed (and why you will be too):
- Party superheroes: One tray feeds a crowd, and nobody can resist them. Game day? Book club? Kids’ sleepover? Sorted.
- Cleanup’s a breeze: Line your pan with foil, and boom—no scrubbing. (I learned this after my third pan-soaking incident.)
- Customizable AF: Swap ham for turkey, add pickles, or drizzle with honey mustard. They’re basically a flavor playground.
Seriously, these sliders are the culinary equivalent of a trusty pair of jeans—comfortable, reliable, and they make everything better. Even my picky nephew inhales them, and that kid lives on chicken nuggets.
Ingredients for Baked Ham and Cheese Sliders
Let’s talk ingredients—because the magic happens when you get these simple components just right. I’ve made these sliders dozens of times (okay, maybe hundreds), and here’s exactly what you’ll need for that perfect bite:
- 12 dinner rolls – Those soft, squishy ones from the bakery aisle work best (more on alternatives below!)
- 1/2 lb thinly sliced ham – Don’t skimp here! Get the good deli stuff, not that rubbery pre-packaged kind
- 6 slices Swiss cheese – Pro tip: tear them in half so they drape nicely over the ham
- 1/4 cup butter, melted – Salted butter makes the sauce pop, but unsalted works too
- 1 tbsp Dijon mustard – The secret zing! Yellow mustard in a pinch, but Dijon’s my ride-or-die
- 1 tbsp Worcestershire sauce – That umami kick you can’t quite place? That’s this magic potion
- 1 tsp onion powder – No chopping required! Pure lazy-cook brilliance
- 1 tsp poppy seeds – These little guys add crunch and make ’em look fancy
Ingredient Substitutions
Listen, life happens—here’s how to pivot when your fridge rebels:
- Cheese swaps: Swiss not your thing? Cheddar gives a sharper bite, provolone melts beautifully, or go dairy-free with your favorite vegan shreds
- Roll options: Hawaiian rolls bring sweetness (my kids’ fave), whole wheat adds nuttiness, or grab mini baguettes for a crustier vibe
- Protein shake-up: Turkey slices work great, or for vegetarians, roasted portobellos are shockingly good
See? No stress. The only non-negotiable is that butter sauce—trust me, it’s the glue (literally) holding this deliciousness together.
How to Make Baked Ham and Cheese Sliders
Alright, let’s get these beauties in the oven! I promise it’s easier than folding a fitted sheet (why are those things so impossible?). Here’s exactly how I make them every single time—follow these steps, and you’ll have golden, gooey perfection in no time.

- Preheat your oven to 350°F (175°C). Don’t skip this! A properly heated oven means even melting and browning. While it warms up, grab your baking dish—a 9×13-inch pan is perfect.
- Slice those rolls like a champ. Use a serrated knife to cut the entire slab of rolls in half horizontally (keep them connected—no individual slicing!). Place the bottom halves in your baking dish. They should fit snugly like puzzle pieces.
- Layer on the goods. First goes the ham—I like to fold each slice into little ruffles so every bite gets some. Then tear those Swiss slices in half and drape them over the ham like tiny cheesy blankets. Pop the top halves of the rolls back on—it’s sandwich-making time!
- Make that magic butter sauce. In a microwave-safe bowl, melt your butter (about 30 seconds does it). Whisk in the Dijon, Worcestershire, and onion powder until it’s all smooth and golden. This is the flavor bomb that takes these from “meh” to “MORE!”
- Drench those sliders. Slowly pour your butter mixture over the tops of the rolls, making sure to cover every nook and cranny. Use a brush if you need to spread it around—this is where the flavor seeps in! Sprinkle those poppy seeds on top like edible confetti.
- Bake until golden. Pop them in the oven for 15-20 minutes. You’ll know they’re ready when the cheese is bubbling at the edges and the tops turn a gorgeous golden brown. Your kitchen will smell like heaven.
Pro Tips for Perfect Sliders
Here are my hard-earned secrets after many, many trays of sliders (and a few mishaps along the way):
- Foil is your friend. For super easy cleanup, line your baking dish with foil before assembling. Bonus: it helps keep the bottoms from getting too crispy if you prefer softer rolls.
- Let them rest. I know it’s tempting to dive right in, but wait 5 minutes after baking! This lets the cheese set slightly so your sliders don’t turn into a melty mess when you cut them apart.
- Double the sauce if you’re extra. (I’m extra.) Mix another batch of the butter sauce to serve on the side for dipping—trust me, people will fight over it.
There you have it—the no-stress path to slider glory. Now go forth and bake! (And try not to eat them all before your guests arrive. No judgments if you fail.)
Serving Suggestions for Baked Ham and Cheese Sliders
Oh man, let’s talk presentation—because these sliders deserve to shine! I’ve served them everywhere from backyard BBQs to fancy-ish baby showers (just add cute toothpicks), and here’s how to make them the star of any spread.

For casual noshing: Pile those warm sliders onto a wooden board with:
- A big bowl of pickle spears (the vinegar cuts through all that richness)
- Ridged potato chips for that perfect crunch contrast
- Grapes or apple slices—something fresh to balance things out
Party mode activated? Turn them into a full meal with:
- A simple arugula salad with lemon dressing (takes 2 minutes, looks fancy)
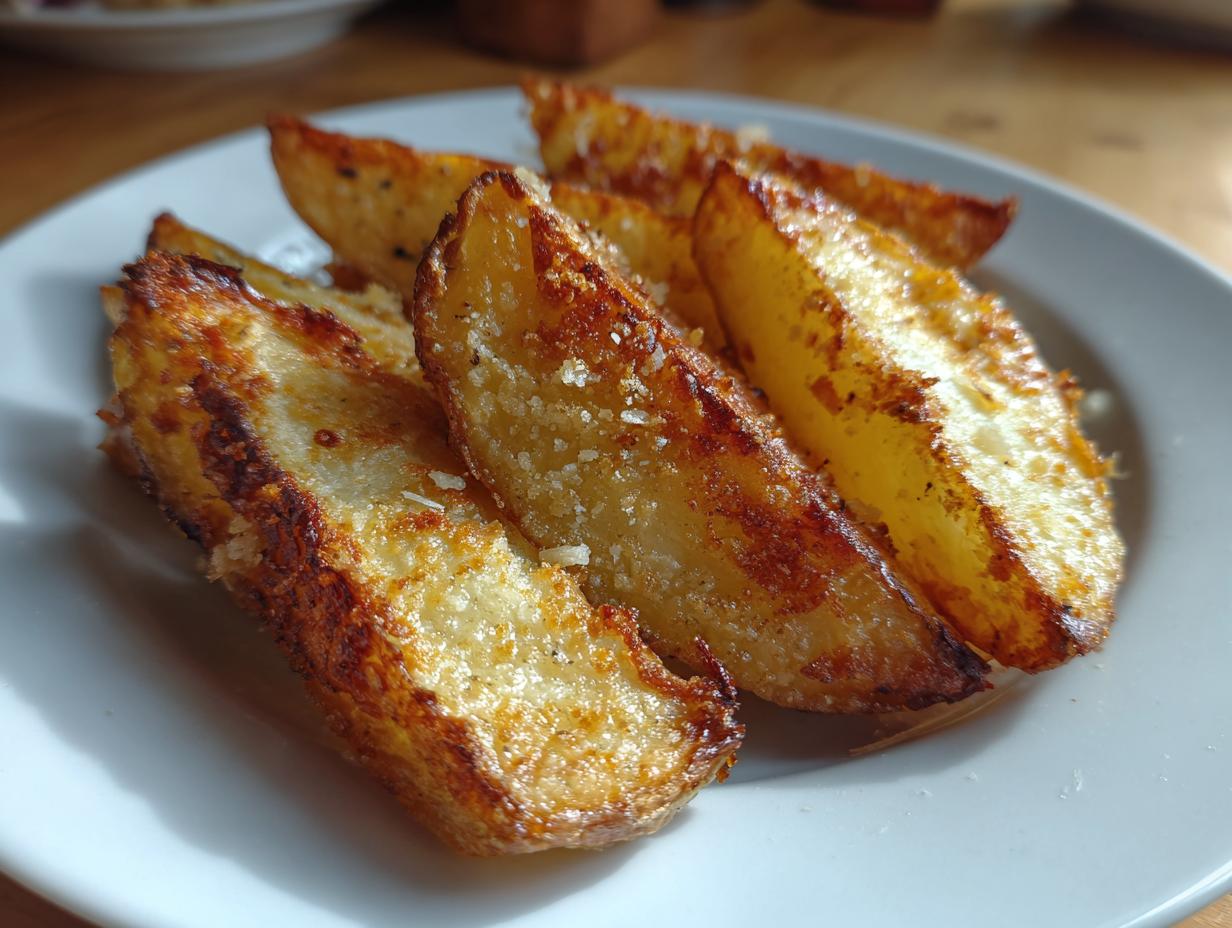
- Oven-roasted sweet potato wedges (toss with olive oil and rosemary)
- That classic pasta salad everyone secretly loves—you know the one
Here’s my favorite trick: label them “Hawaiian Roll Sliders” at potlucks, even if you didn’t use Hawaiian rolls. People lose their minds thinking there’s pineapple involved (there’s not—but hey, whatever gets them to try one!).
For kids’ parties, I stick a colorful toothpick in each slider and call them “mini sandwiches”—instant hit. And if you’re feeling extra, warm up a small dish of extra butter sauce for dipping. (Warning: This may cause marriage proposals.)
Storage and Reheating
Okay, real talk—these sliders rarely last long enough to need storing in my house. But when they do (miracle of miracles!), here’s how to keep them tasting fresh and fabulous. Because soggy sliders? That’s a culinary crime we won’t tolerate.
Fridge storage: If you’ve got leftovers (bless you, self-control), wrap them tightly in foil or pop them in an airtight container. They’ll keep for up to 3 days—but good luck making them last that long. The butter sauce soaks into the rolls a bit overnight, which honestly makes them even more flavorful.
Reheating like a pro: Skip the microwave unless you enjoy steamed-bread texture! Instead:
- Oven method: Preheat to 300°F (150°C), wrap sliders in foil, and warm for 10-12 minutes. Uncover for the last 2 minutes if you want crispy tops.
- Air fryer hack: My new obsession! 350°F (175°C) for 3-4 minutes brings back that perfect crunch.
Pro tip: If the cheese needs a little revival after refrigeration, I sometimes add a fresh sprinkle before reheating. It’s like giving your sliders a cheesy second wind!
Freezing? I’ve done it in a pinch—just thaw overnight in the fridge before reheating. They won’t be *quite* as perfect as fresh, but still miles better than most frozen snacks. Perfect for those “emergency hunger” moments (you know the ones).
Nutritional Information
Let’s be real—these sliders aren’t health food, but everything’s about balance, right? Here’s the nutritional lowdown based on my standard recipe (because yes, I actually did the math while eating my third slider “for research”).
Per slider (that’s one delicious little sandwich):
- 220 calories – Perfect snack size or pair two with salad for a meal
- 12g fat – Mostly from that glorious butter and cheese (worth it)
- 11g protein – Thanks to the ham and cheese combo!
- 18g carbs – Mostly from the rolls
- 480mg sodium – The ham and Worcestershire pack a salty punch
Now for my standard disclaimer (said while brushing poppy seeds off my shirt): Nutrition varies based on ingredients. Swap Hawaiian rolls? That’ll add sugar. Use low-sodium ham? Sodium drops. Dairy-free cheese? Fat content changes. You get the idea.
My philosophy? These are meant to be enjoyed—not stressed over. Maybe balance them with a veggie-heavy dinner later. Or don’t! Life’s too short to skip buttery, cheesy goodness.
Frequently Asked Questions
Let’s tackle those burning questions I always get about these sliders—because trust me, after making them for every gathering since 2017, I’ve heard them all!
Q1. Can I assemble these ham and cheese sliders ahead of time?
Absolutely! My secret party trick: assemble everything (even drizzle the butter sauce), wrap tightly in foil, and refrigerate for up to 6 hours before baking. Add 2-3 extra minutes to the bake time since they’re going in cold. The rolls might get slightly more saturated, but in a good “flavor-soaked” way!
Q2. What’s the best cheese substitute if I don’t like Swiss?
I get it—Swiss isn’t for everyone. My top picks: sharp cheddar for bold flavor, provolone for ultimate meltiness, or pepper jack if you want a little kick. For dairy-free folks, the Violife smoked provolone shreds work shockingly well (just pack them in tightly since they don’t slice).
Q3. Help! My sliders got too brown on top—what happened?
Oh honey, we’ve all been there. Usually means your oven runs hot (mine’s a feisty one too). Next time, tent with foil after 10 minutes of baking. Or try lowering the temp to 325°F and baking a tad longer. Still tasty, just… extra crispy!
Q4. Can I use something other than dinner rolls?
Totally! Hawaiian rolls are my go-to swap—they add sweetness that plays so nice with the salty ham. For smaller parties, try slider buns or even cut a French baguette into sections (just reduce bake time by 5 minutes). Gluten-free rolls work too, though they might dry out faster.
Q5. Are these sliders freezer-friendly?
Yes—with caveats! Freeze before baking: wrap the assembled-but-not-baked tray tightly in foil, then plastic. Thaw overnight in fridge before baking as usual (add 5 minutes). Already baked? They’ll lose some texture but still taste decent reheated at 300°F for 12 minutes. Pro tip: freeze individual portions for emergency snacks!
Final Thoughts
There you have it—my all-time favorite baked ham and cheese sliders that somehow manage to be both ridiculously easy and impossibly delicious. I’d love to hear how yours turn out! Did you add a twist with different cheese? Maybe sneak in some hot honey? Leave me a comment or rating—I read every one while nibbling on leftover sliders (purely for inspiration, of course).

And hey, if these sliders save your sanity at your next potluck like they have at mine, share the love! Tag me on social or text the recipe to that friend who always asks “what should I make for book club?” Now go forth and bake—may your cheese be melty and your clean-up minimal!
Print
35-Minute Baked Ham and Cheese Sliders That Always Disappear Fast
- Prep Time: 10 minutes
- Cook Time: 20 minutes
- Total Time: 30 minutes
- Yield: 12 sliders 1x
- Category: Appetizer
- Method: Baking
- Cuisine: American
- Diet: Low Lactose
Description
Easy baked ham and cheese sliders perfect for parties, quick meals, or snacks. These sliders are flavorful, cheesy, and ready in minutes.
Ingredients
- 12 dinner rolls
- 1/2 lb sliced ham
- 6 slices Swiss cheese
- 1/4 cup butter, melted
- 1 tbsp Dijon mustard
- 1 tbsp Worcestershire sauce
- 1 tsp onion powder
- 1 tsp poppy seeds
Instructions
- Preheat oven to 350°F (175°C).
- Slice rolls in half and place the bottom halves in a baking dish.
- Layer ham and cheese on the rolls, then cover with the top halves.
- Mix melted butter, mustard, Worcestershire sauce, and onion powder in a bowl.
- Pour the butter mixture over the sliders and sprinkle with poppy seeds.
- Bake for 15-20 minutes until cheese melts and tops are golden.
- Serve warm.
Notes
- Use Hawaiian rolls for a sweeter taste.
- Substitute Swiss with cheddar or provolone if preferred.
- Wrap in foil for easy cleanup.
Nutrition
- Serving Size: 1 slider
- Calories: 220
- Sugar: 3g
- Sodium: 480mg
- Fat: 12g
- Saturated Fat: 6g
- Unsaturated Fat: 4g
- Trans Fat: 0g
- Carbohydrates: 18g
- Fiber: 1g
- Protein: 11g
- Cholesterol: 35mg
