Oh, pickling! There’s just something so satisfying about taking fresh veggies and turning them into little jars of sunshine. And let me tell you, Pickled Dilly Beans? They’re in a league of their own! That tangy, dilly flavor? It’s just *chef’s kiss*. I remember the first time I tried making them. My garden was overflowing with green beans, and I thought, “Why not?” My first batch was… well, let’s just say a learning experience! But after a few tweaks, I nailed it. Now, I can’t imagine summer without a pantry stocked with these crunchy, dilly delights. They don’t last long, trust me!
Why You’ll Love This Pickled Dilly Beans Recipe
Seriously, you’re gonna be obsessed! Why, you ask? Well, lemme tell ya:
Quick and Easy Pickled Dilly Beans
This recipe is FAST! You’ll spend more time waiting for them to pickle than actually *making* them. I promise!
Tangy and Delicious Pickled Dilly Beans
That dilly, garlicky tang? It’s addictive! These aren’t your grandma’s bland pickles, that’s for sure.
Perfect for Snacking and Sharing Pickled Dilly Beans
Pop ’em straight from the jar, add ’em to a charcuterie board, or give ’em as gifts. Everyone loves a jar of homemade goodness!
Ingredients for Homemade Pickled Dilly Beans
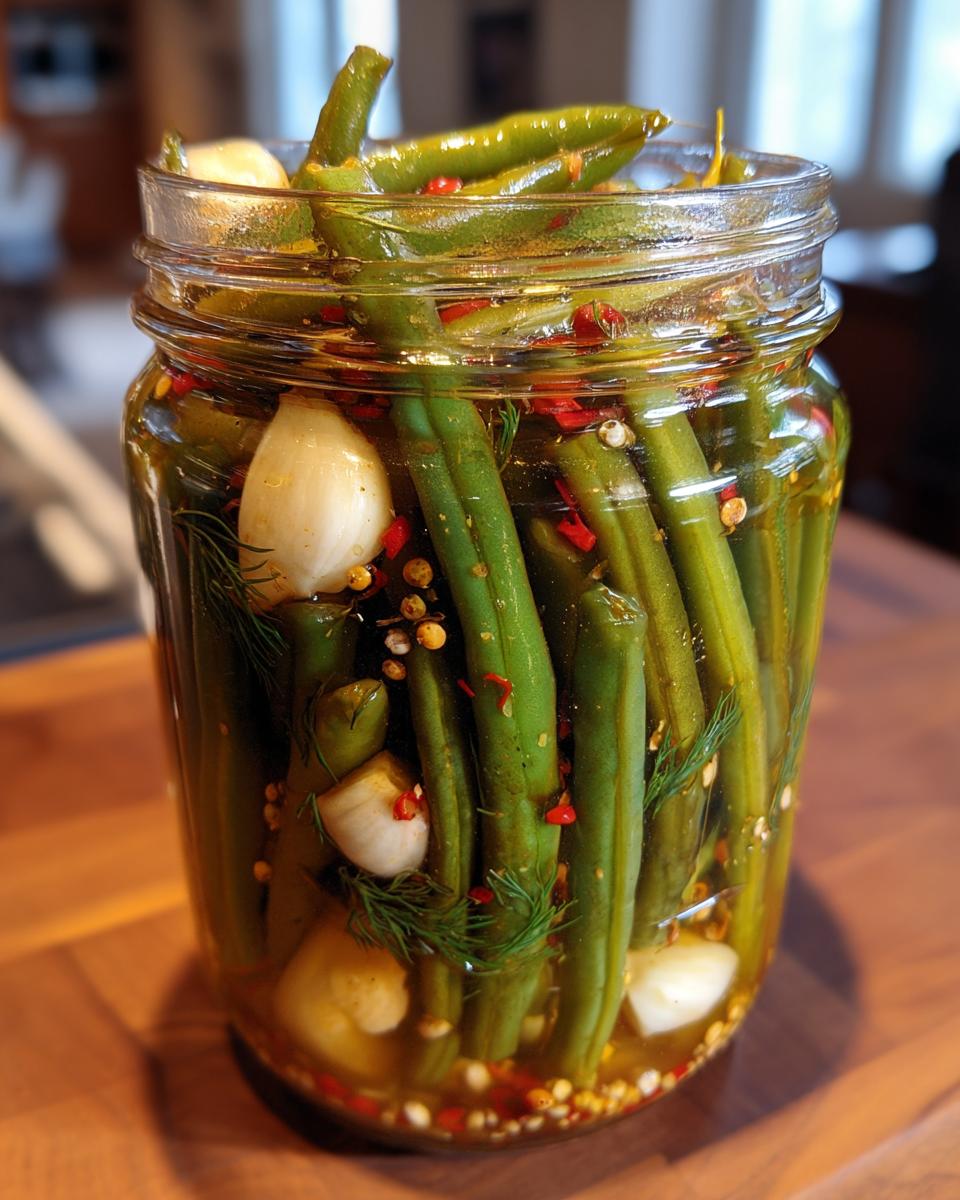
Alright, gather ’round! Here’s what you’ll need to make these dilly delights. You’ll want 1 pound of green beans, trimmed and ready to go. Then grab 2 cups of white vinegar, 1 cup of water, and 2 tablespoons of pickling salt. Don’t forget 4 cloves of garlic, peeled, 4 sprigs of fresh dill, 1 teaspoon of mustard seeds, and a pinch (about 1/2 teaspoon) of red pepper flakes if you like a little kick!
How to Make Pickled Dilly Beans: Step-by-Step Instructions
Okay, let’s get down to business! This might seem a little intimidating if you’ve never pickled before, but trust me, it’s easier than you think. Just follow these steps, and you’ll be snacking on dilly beans in no time!
Preparing the Pickled Dilly Beans
First things first, give those green beans a good wash. Get all the dirt off! Then, trim the ends. I usually snap them in half too, just so they fit nicely in the jars. Don’t worry about being perfect; we’re going for rustic charm here!
Making the Pickled Dilly Beans Brine
Now for the magic potion! In a saucepan, combine your 2 cups of white vinegar, 1 cup of water, and 2 tablespoons of pickling salt. Bring that mixture to a rolling boil. Careful, it splatters a bit! Just keep stirring until the salt dissolves completely.
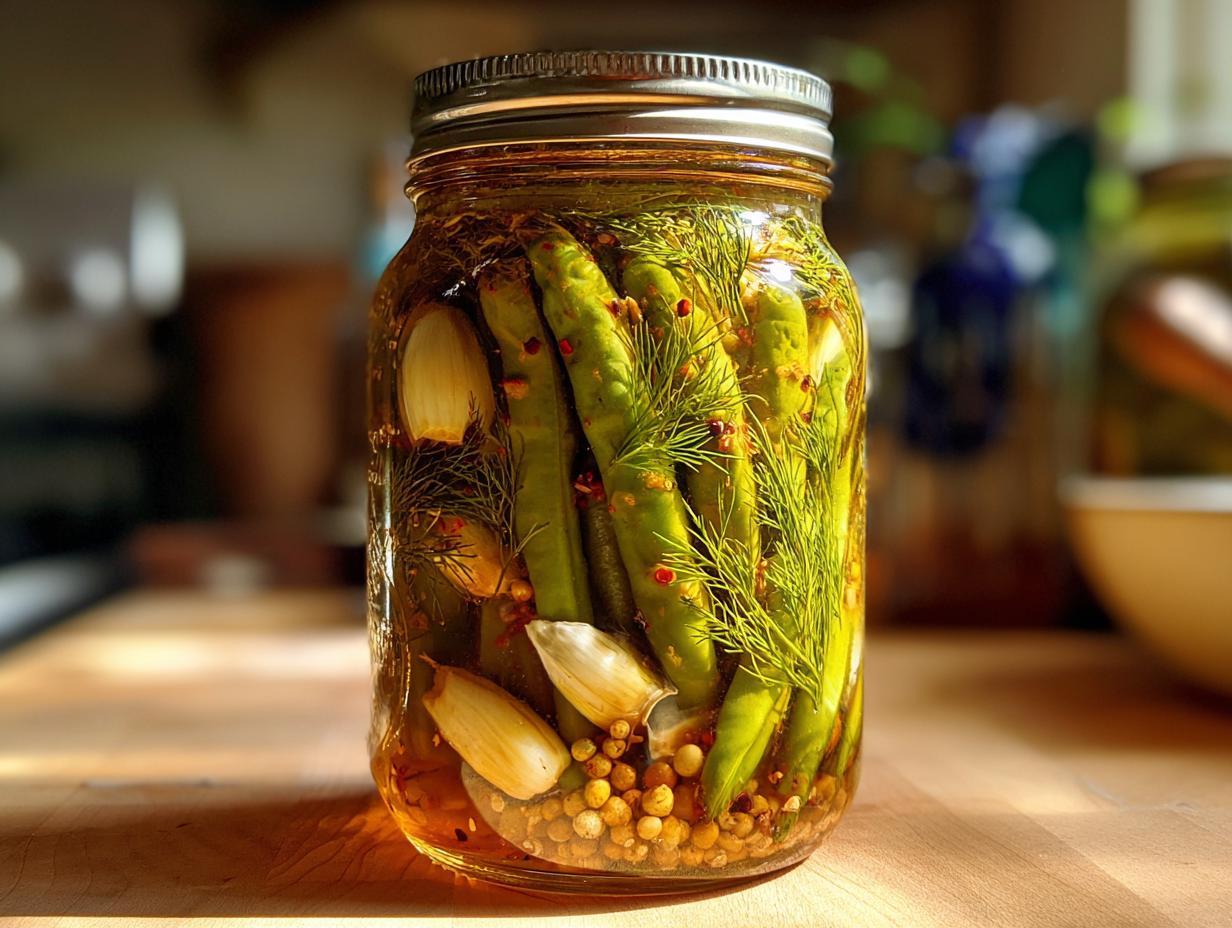
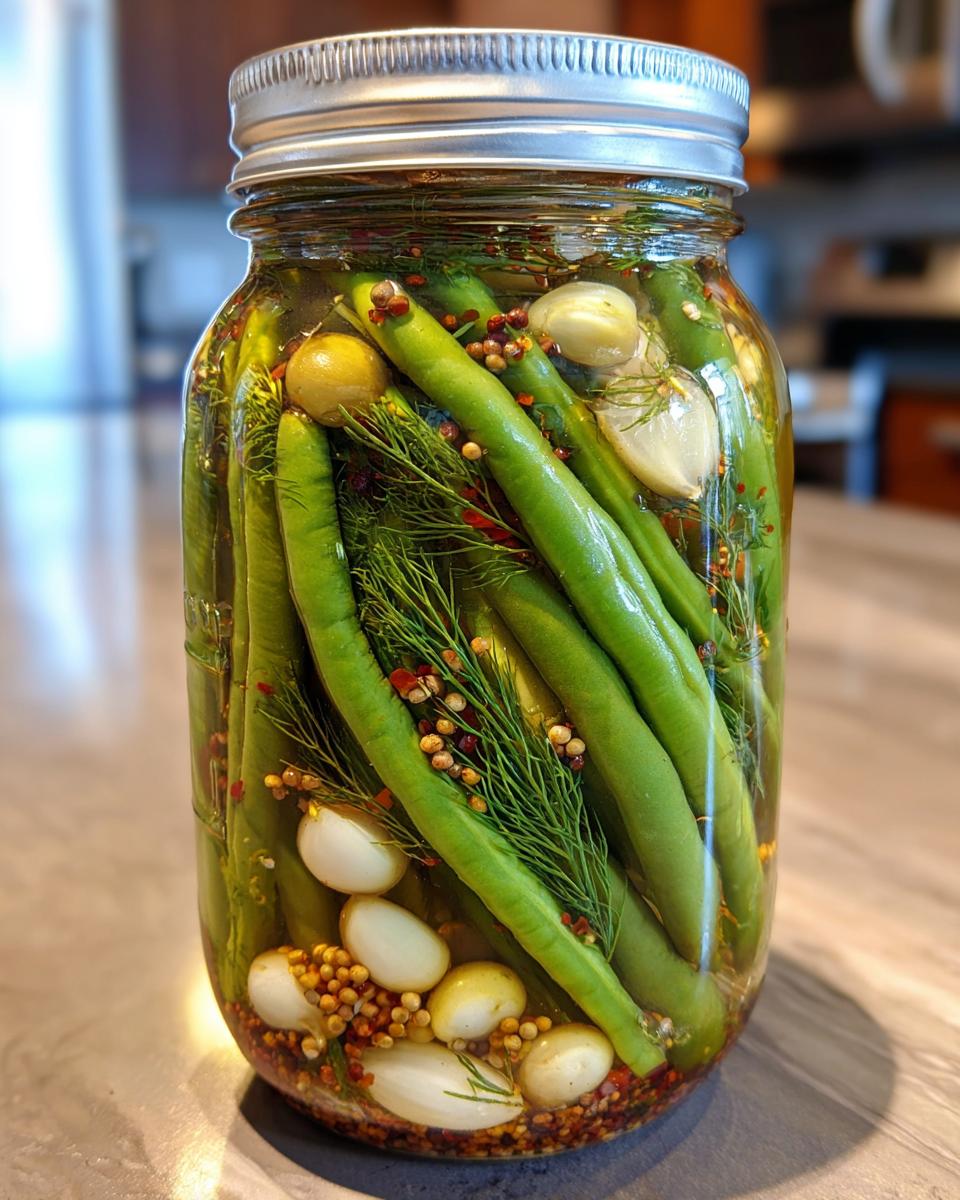
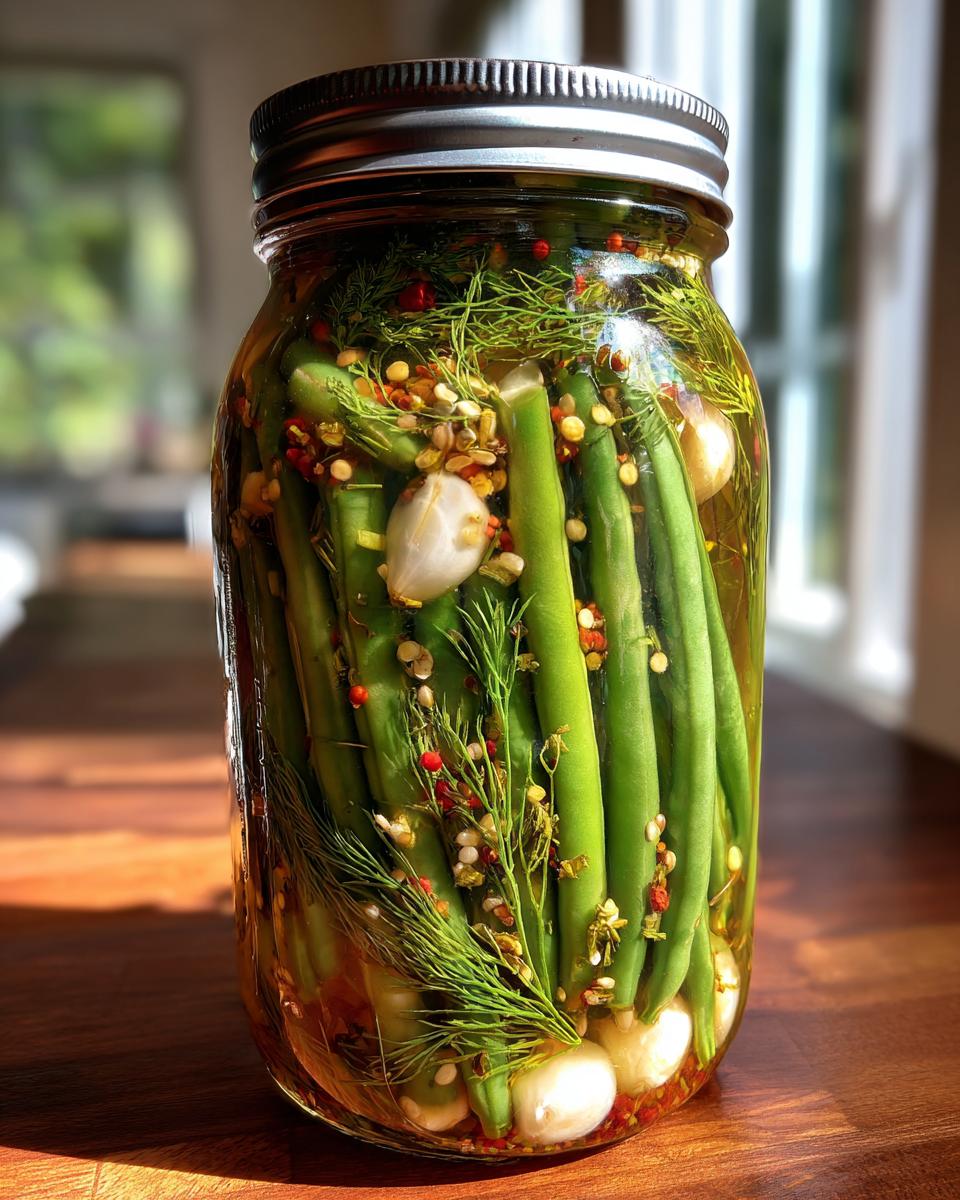
Jarring the Pickled Dilly Beans
Time to pack those jars! Make sure they’re sterilized, okay? I usually run mine through the dishwasher on high heat, but you can boil them too. Now, into each jar, stuff some beans, a clove of garlic, a sprig of dill, a pinch of mustard seeds, and a sprinkle of red pepper flakes (if you’re feeling spicy!). Pour that hot vinegar mixture over the beans, leaving about 1/2 inch of headspace at the top. That’s super important!
Processing the Pickled Dilly Beans
Alright, almost there! Gently tap the jars on the counter to release any air bubbles. You can also use a clean utensil to poke around the edges. Wipe the rims clean, then pop on the lids and screw on the bands fingertip-tight (not too tight!). Process them in a boiling water bath for 10 minutes. Make sure the water covers the jars by at least an inch or two.
Cooling and Storing Pickled Dilly Beans
Carefully remove the jars from the water bath and let them cool completely on a towel-lined surface. You should hear a “pop” as they seal – that’s music to my ears! Now, the hardest part: resist the urge to eat them right away! Let those babies sit for at least 2 weeks so the flavors can meld. Trust me, it’s worth the wait!
Tips for the Best Pickled Dilly Beans
Want to make *amazing* dilly beans? Of course, you do! Here’s the inside scoop. First, pick the freshest, snappiest green beans you can find. They should squeak when you bend them! As for the brine, don’t be afraid to adjust the spices to your liking. More garlic? Go for it! And speaking of jars, sterilization is KEY. Don’t skip that step, or you’ll end up with mushy beans (yuck!). But the biggest tip? Patience, my friend! That 2-week waiting period is crucial. The longer they sit, the better they taste. I promise!
Pickled Dilly Beans Variations
Okay, so you’ve mastered the basic dilly bean. Awesome! Now, wanna get a little crazy? Let’s talk variations! My favorite is adding a few sprigs of tarragon along with the dill. It gives it this subtle licorice-y flavor that’s just *amazing*. You could also try different spices – a pinch of coriander or even a bay leaf can add a whole new dimension. And hey, who says you have to stick with green beans? Yellow wax beans work great too! Or, for a real party in a jar, throw in some sliced carrots or pearl onions. Just make sure you keep the vinegar-to-water ratio the same, okay?
Frequently Asked Questions About Pickled Dilly Beans
Got questions? I got answers! Pickling can seem mysterious, but it’s really quite simple once you get the hang of it. Here are some of the most common questions I get about Pickled Dilly Beans:
How long do Pickled Dilly Beans last?
If you’ve canned them properly (sterilized jars, proper processing time, good seal), they’ll last at least a year in your pantry. But honestly? They never last that long at my house!
Can I use different vinegar?
White vinegar is best for that classic tangy flavor and clear color, but you *could* use apple cider vinegar for a slightly sweeter, more complex flavor. Just don’t use balsamic or anything too fancy, okay?
What kind of salt should I use?
Pickling salt is the way to go! It’s pure sodium chloride without any iodine or anti-caking agents that can make your brine cloudy. If you can’t find it, kosher salt works in a pinch.
How do I sterilize jars?
Easy peasy! Just run them through a hot cycle in your dishwasher, or boil them in a large pot of water for 10 minutes. Make sure to keep them hot until you’re ready to fill them!
Estimated Nutritional Information for Pickled Dilly Beans
Okay, so wondering about the nutritional lowdown? Each serving (about 1/4 jar) clocks in around 30 calories. We’re talkin’ practically zero fat, about 1 gram of protein, and around 6 grams of carbs. But hey, that’s just an estimate, alright?
Enjoy Your Homemade Pickled Dilly Beans!
Alright, go on and enjoy those dilly beans! And hey, if you loved this recipe, leave a comment below! Don’t forget to rate it and share on social media. Happy pickling!
Print
Unbelievably Delicious Pickled Dilly Beans in 10 Minutes
- Prep Time: 20 minutes
- Cook Time: 10 minutes
- Total Time: 30 minutes + 2 weeks for pickling
- Yield: 4 pint jars 1x
- Category: Appetizer, Side Dish
- Method: Pickling
- Cuisine: American
- Diet: Vegan
Description
Crisp and tangy pickled dilly beans.
Ingredients
- 1 pound green beans, trimmed
- 2 cups white vinegar
- 1 cup water
- 2 tablespoons pickling salt
- 4 cloves garlic, peeled
- 4 sprigs fresh dill
- 1 teaspoon mustard seeds
- 1/2 teaspoon red pepper flakes (optional)
Instructions
- Wash and trim green beans.
- Combine vinegar, water, and salt in a saucepan. Bring to a boil.
- Pack beans, garlic, dill, mustard seeds, and red pepper flakes (if using) into sterilized jars.
- Pour hot vinegar mixture over beans, leaving 1/2 inch headspace.
- Remove air bubbles and seal jars.
- Process in a boiling water bath for 10 minutes.
- Let cool completely before storing.
Notes
- Ensure jars are properly sterilized for safe preservation.
- Adjust red pepper flakes to your spice preference.
- Allow beans to sit for at least 2 weeks for best flavor.
Nutrition
- Serving Size: 1/4 jar
- Calories: 30
- Sugar: 1g
- Sodium: 400mg
- Fat: 0g
- Saturated Fat: 0g
- Unsaturated Fat: 0g
- Trans Fat: 0g
- Carbohydrates: 6g
- Fiber: 2g
- Protein: 1g
- Cholesterol: 0mg